UI Widget
Improve your cure rate with this additional component. The UI Widget allows customer to correct/add required information to rescue their payment transaction.
When a transaction is declined by the PSP and sent over to Flex with POST /evaluate, the response will be either APPROVED, DECLINED or CHALLENGE.
Unlike the Standard CIT integration, the Advanced integration can rescue transactions that require a CHALLENGE.
CHALLENGE status is returned when the transaction could be rescued by Flex if some additional/corrected information are provided (e.g.: CVV, billing address).
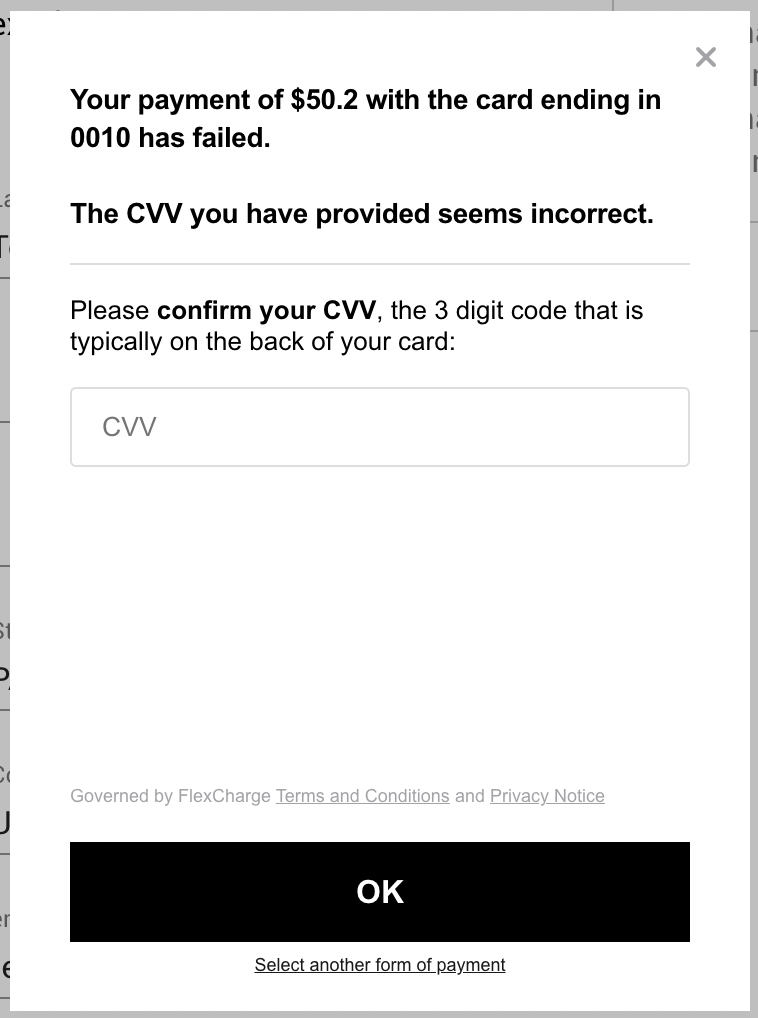
Example of challenge: CVV was incorrect.
Transaction can be rescued by customer direct input.
Overview
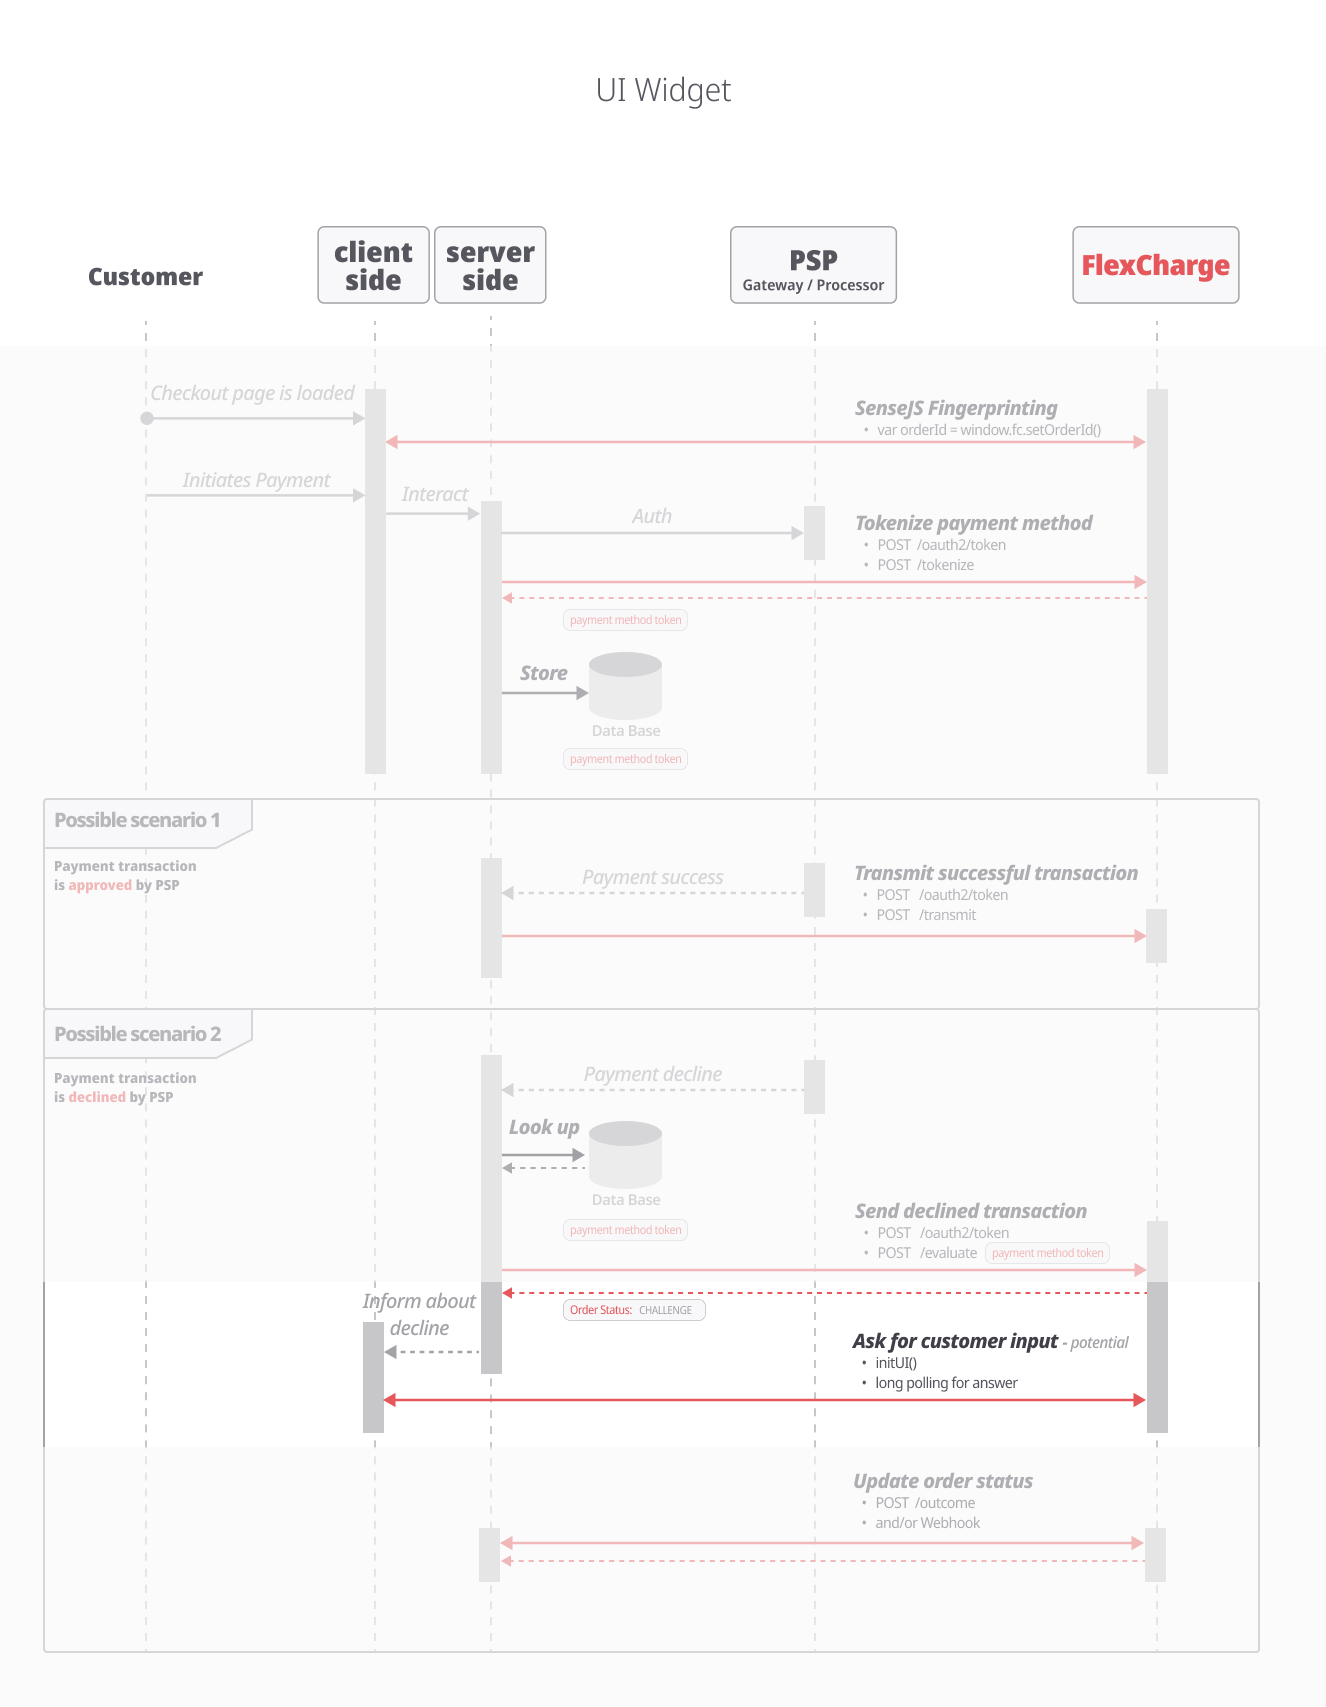
The UI Widget is embedded on the checkout page and invoked after a decline.
1. Embed UI Widget
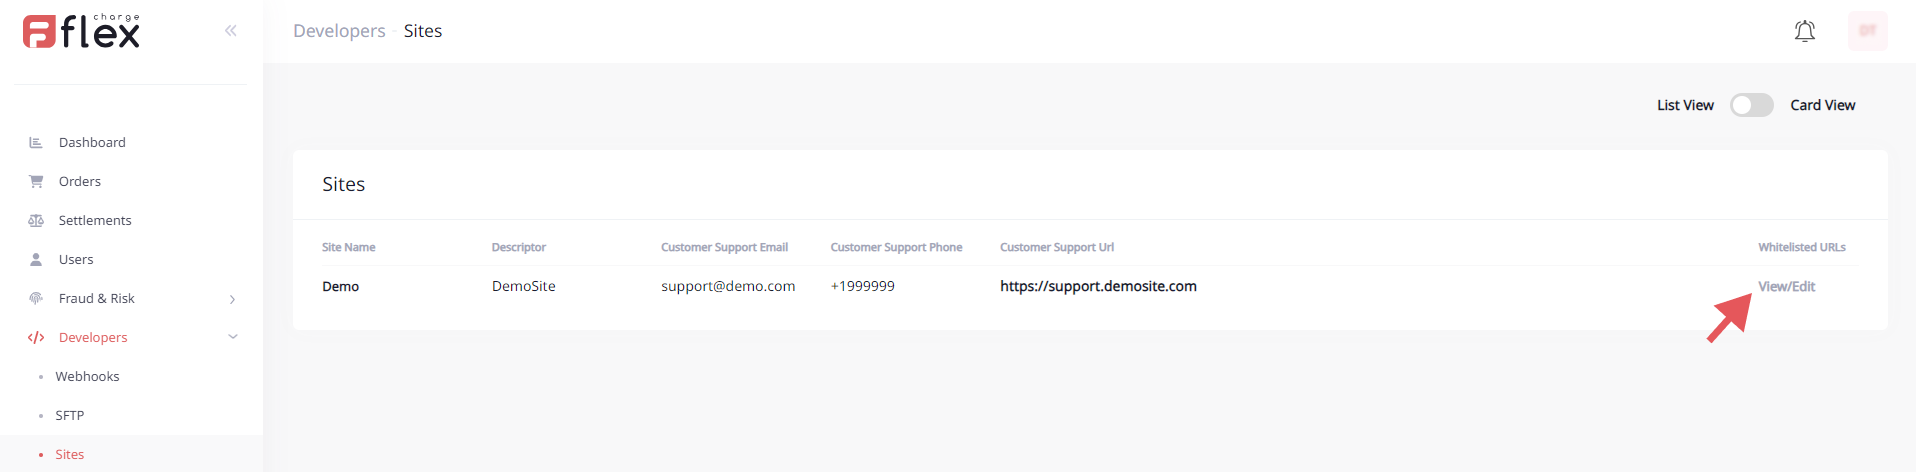
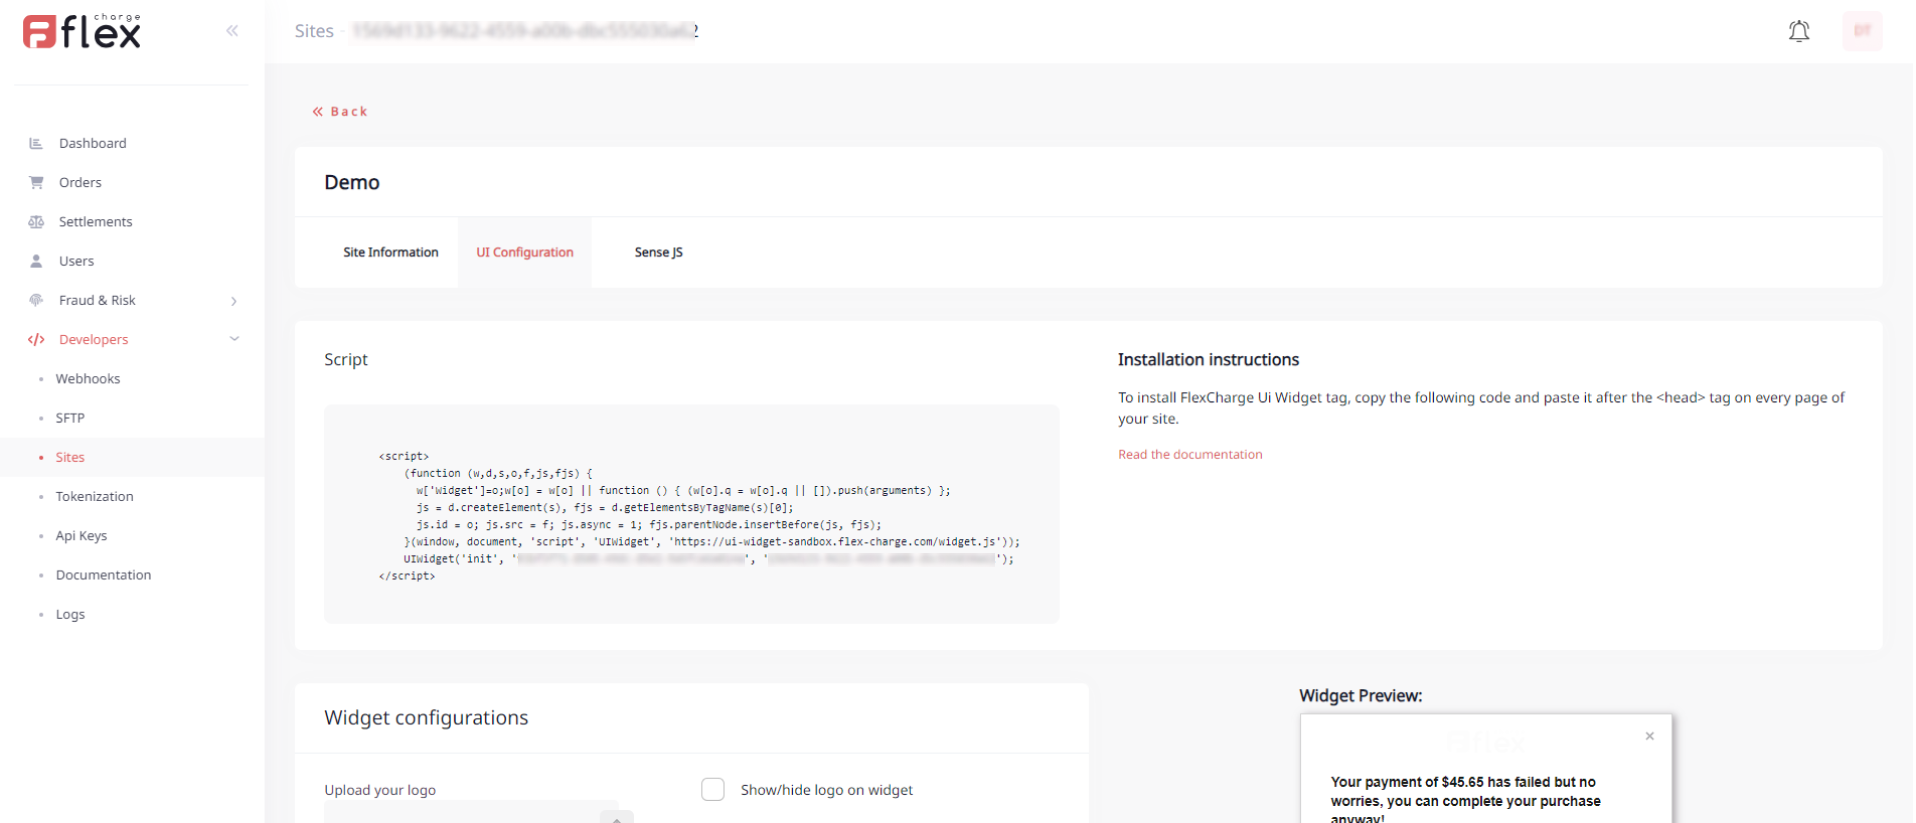
The snippet to embed the UI Widget can be found in your Sandbox account. Developers > Sites > View/Edit > UI configuration
mid | Your Flex Merchant Identification Number. Get your Mid |
siteId | Unique id for each of your websites. If you are implementing Flex on several websites, make sure that UIWidget snippet contains the right siteId. |
Content Security Policy
If you use CSP (Content Security Policy) headers on your site, you must allow the "*.flex-charge.com" in connect-src directive for full functionality based on your host configuration.
Content-Security-Policy: connect-src 'self' https://*.flex-charge.com;
2. Invoke UI Widget
Call InitUI() when a declined transaction was sent to Flex.
Instead of showing the decline page to the customer, invoke initUI().
Make sure to also set the success/fail urls, the UI Widget will take care of redirecting the customer to the right page.
<script>
    window.addEventListener('load', function() {
            window.UIWidget.InitUi({
                successUrl: 'https://your-site-success-page',
                rejectUrl: 'https://your-site-decline-page',
                cancelUrl: 'https://your-site-cancel-page',
            });
        });
</script>
You are using callbacks instead of redirections?
Events listeners
The UI Widget allows adding events, to which you can register easily, by calling .on(eventName, callbackFunction) on your Widget instance.
| Event Name | Description |
|---|---|
| success | Event triggers if a customer clicks on the "Ok" button on the success popup. |
| decline | Event triggers if a payment was rejected or if a customer clicks the "Ok" button on the decline popup. |
| cancel | Event triggers if a customer clicks on the "Close" button. |
UIWidget.on("success", () => {
  console.log("Do something");
});
Events can be removed.
UIWidget.removeEvent("success")
Widget initialization argument object fields
How to pass additional information to the UI Widget during initialization.
You can set additional fields for argument object when you trigger InitUi method. This information is essential for the UI Widget to function properly and to provide the user with a seamless payment experience.
| Name | Type | Required | Description |
|---|---|---|---|
| orderSessionKey | guid/uuid | optional | Current order session unique key. |
| successUrl | string | optional | Url to redirect to success page. |
| rejectUrl | string | optional | Url to redirect to decline page. |
| cancelUrl | string | optional | Url to redirect to cancel page. |
UIWidget.InitUi({
  successUrl: 'https://your-site-success-page',
  rejectUrl: 'https://your-site-decline-page',
  cancelUrl: 'https://your-site-cancel-page',
});
3. Update the order status
When using the UI Widget, you will get a async response. The UI WIdget will be long polling for Flex response in real time, but the definitive order status must be retrieved on the server side.
This can be done in two ways:
Updated 12 days ago